Saturday, August 11, 2012

A Lazy Afternoon

I have no clue
what to do
not that there arent things to be done
chores are many but will is none
hands are glued to the keyboard, eyes to the screen
no motivation to get up and even scream.

Thursday, August 2, 2012

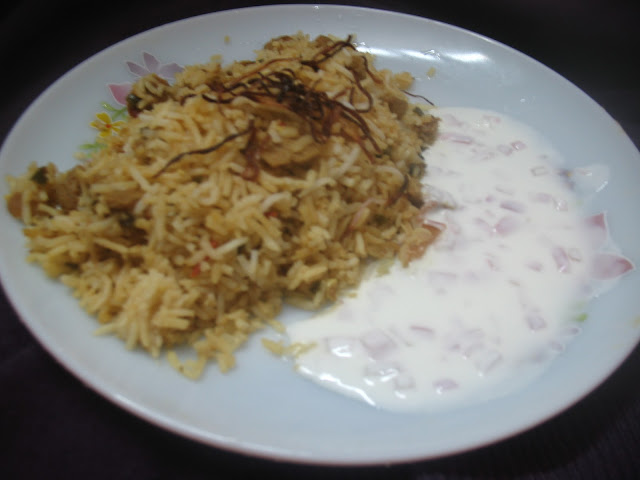
Soya Dum Biriyani

Dum is a cooking method that has always sent shivers down me spine!!!
I could think of a zillion things that could go wrong if I tried it and was therefore more than happy with my cooker Biryani's (can you even call them that?).
Then this site happened to me : http://www.fauziaskitchenfun.com
The array of mouthwatreing dishes there had me drooling for at least a couple of hours (how jobless am I @ office, hope non of my colleagues see this :D) 
She had some fantastic recipes for Biryani's here and I just coudnt resist, I just had to try this method now.
I knew I could do it (seems so now) !!!!


This was a ercipe for a keema Biryani, so I have adpapted that to a vegetarian version.
Here's how its done
 
Biryani’s Masala
In a bowl add:
½ tsp. red chili powder
1 tbsp. ginger garlic paste
1 tbsp. coriander powder
salt to taste
1 tsp. black jeera/cumin (did not have,so did not use)
1 tsp., 3-4 green cardamoms
1 bay leaf 1
¼ tsp. turmeric powder
¼ tsp. cumin/jeera powder
6-8 black pepper

1/2 a cup of Soya Chunks cooked as per pack instruction,drained and chopped.
1/2 bunch of pudhina leaves - chopped finely
1/2 bunch of spring onions - white and green separately chopped

INSTRUCTIONS
Add enough water to mix well and form a thick paste
Heat about quarter cup of oil (i only used 3 TBSP), add the spring onion whites and saute for 1-3 mins, then add 3 big finely chopped tomatoes chopped and the masala mixed in the bowl. Stir well till oil separates ..Adding some water if needed until the tomatoes are well cooked. Then add 2 fried onion and 1/4 cup curd and mix well …add chopped Soya chunks. Keep adding water a little at a time if needed and mix by moving/swirling the pan, do not dry the gravy , it should be little wet. Before switching off the flame add half the chopped pudhina(mint) and the spring onion greens.
Cover and keep aside.

Make biryani rice as follows:
Wash then soak 3 cups of rice in water for about 20-30 mins.
Soak a few saffron strands in some water and set aside.
Bring a big pot of water to boil, add salt, 4 cardamom pods, 2-3 cinnamon sticks and 2-3 cloves and rest of teh pudhina leaves plus about 2 tbsp. of oil.
Drain the soaked rice and add it to this water when it is boiling. Cook until the rice is about 3/4 done, remove and strain out all the water.
Now layer the rice in a big pot, placing the biryani masala in the between layers of rice then drizzle 2 tbsp. of oil, some soaked saffron water and some orange/yellow color on the rice. Seal the pot and put on dum/steam it on the stove….or bake in the oven for about 10 minutes. Serve!!


Crunchy Peanut Buttons

I just LOVE Ria's blog, Ria's Collection.
She has a great collection of recipes in her blog which i am sure all are familiar with after all she is our Vanitha Pachakarani 2011 :).
I have also tried her Biscuit Pudding and that's a keeper for sure....yummmmm .. do check it out.
Super simple to make and super duper tasty!!!

Also what I really liked were her prompt replies to my queries. When I first tried these out it was not a smooth ride and she really helped me lot!!!!! Thank you so much for that
These are my first ever home baked cookies ,so they very special :)

I followed Ria's recipe with just some minor adjustments for the benefit of baby S.
Also used lesser quantity as me n cookies do not have such a good history :D ... but I guess that's changing now...
Next time planning to follow Ria's measurements and maybe store half the dough in the fridge and use when required? Not sure, will post if I ever try that.

Adapted from Ria's Collection

Ingredients:

Wheat flour-1/2 C
Butter -1/2 C (make sure it's at room temperature) or enough to bind the ingredients together
Powdered sugar- 1/2 C
Peanuts ( without the skin) -1/2C -- i roasted them in M/W for around 3 minutes before using them
 
please excuse the poor picture quality - taken from my phone :(
  • Roughly powder the nuts in a mixer.This makes it crunchier, but as I was making them for the baby i powdered them a little finely.
  • Mix all the ingredients together and form 1/2 lime sized balls and flatten lightly with your hands or with a fork.
  • Place them on an ungreased cookie sheet and bake at 180 degrees for 15 mins.(mine took around 20 mins, will depend on the oven temperatures i guess)
  • They might be soft, but will harden once cooled.
  • Store in airtight tins.
And as she promises these are highly addictive.
Im afraid i will have to bake a fresh batch for my lil one as all the grown up kids(us) are finding it really hard to keep their hands off this :D 
Maybe i will finally find my misplaced camera's connection cable and be able to take decent pictures of them.... Wish me luck.

Microwave Carrot Cake

If I said this was the tastiest carrot cake I've ever had, i wouldn't be wrong (not only because this was my first and only ;)) , and that too in the microwave in just 12 minutes!!!! Can you beat that!
I tried this out during the winter when lovely fresh carrots were available.
The oven was a relatively new attachment back then and I did not have much knowledge on how to use it in any other mode ,like the conventional,grill etc.
It was only after the food blogs happened to me that I started to utilize the oven more adequately (which shows in our monthly electricity bills much to S's dismay, but now noone can complain that the oven it just sitting there gathering dust and taking up space :D . I am sure he is eating his words now(literally) :D)

Recipe adapted from Cooks.com
3 eggs  (I used only 2)
1 1/2 c. sugar
1 c. oil
1 tsp. vanilla extract
1 1/2 c. flour
3/4 tsp. salt
1 1/4 tsp. baking soda
2 1/2 tsp. cinnamon
1 tsp. cloves (I did not use this)
2 1/2 c. grated carrots (4-5)
3/4 c. chopped nuts  (I toasted the nuts for about a minute and half ,till they were golder before adding them. Oh BTW i used cashews. Used a mixture of cashews and raisins.)
close up view. you can see the lovely specks of carrot,raisins and nuts
In a large mixing bowl, combine eggs, sugar, oil and vanilla. Blend in flour, salt, baking soda, cinnamon and cloves. Fold in carrots and nuts. Pour into 12 cup microwave bundt pan. Microwave high (100%) 12 to 14 minutes, rotating 1/4 turn every four minutes. Rest 10 minutes.Loosen sides and center; invert on serving plate.
I server it as it is without any frosting.
If you live in a country with access to cream cheese you can try the frosting given in the site.

MW Carrot Cake

All in all it was a lovely cake and no-one can tell that it was baked in MW. The texture is just right and its carroty and nutty.
We didn't find the offensive eggy smell either , i think the Cinnamon did the trick, if I had added the cloves as well it would have given it a very nice christmassy feel, like Christmas plum cakes.
This is just PERFECT with a nice hot cup of tea/coffee, curl up on the sofa with a nice book in hand...aaahhh life is good!

Next time will take decent blog worthy pics :).


Notes:
Since Cinnamon is not a commonly used spice in desserts at home so I did not have cinnamon powder handy.
I placed a 1/2" piece cinnamon stick in the blender/mixer jar along with sugar and powdered it.Adjust the cinnamon according to your liking as it has a very strong flavor and can be unpleasant if gone overboard.

Gobi Manchurian ....M@nju Shtyle!!!

Gobi Manchurian is in-arguably the most devoured dish in India (though it passes off as a Chinese dish , I seriously doubt if the Chinese even know of its existence.)
I am very much addicted to Food channels on TV and undoubtedly TLC was/is my favourite.
I love watching Nigella, Rachel Allen, Kylie Kwong and others preparing and presenting their dishes.
In all of Kylies shows that I have followed ,never once have I seen or heard her prepare anything manchurian (did I miss it , if anyone out there has please let me know).
But authentic Chinese or not this dish has captured the heart of every Indian, and we were no exceptions.

Now Sundays are generally meant to be feasting days as its a holiday and as S assumes that I have rested enough on Saturdays(as if!! Is there any rest for a working mom of a 2 year old???  Not exactly but yeah i do manage to get my beauty sleep :D).
So on Sundays I usually prepare some Biryani/Fried rice and a curry to go with it (If im up to it) .
After looking here and there and everywhere and not finding any recipe suited to our tastes(was looking for eggless, as I have seen many using egg whites) i dicided to do an experiment on my own after some basic lessons on it from some shows on TV.

Gobhi (Cauliflower) --- 1 . Cut into florets and cleaned. Keep the size small as its easier to handle and looks aesthetic
Onion -- 2 . finely chopped
Ginger/Garlic -- finely chopped/or paste (I prefer freshly chopped/ground than the packed one's) -- 5-6 tsp
I love garlic so i tend to go overboard with it .. you can use 2-3 tsp for a mild flavor.
Spring Onions  -- 1/2 bunch - White and green chopped fine separately
Capsicum -- diced - 1 (i used a small one as I'm not a fan)
Soy Sauce -- 3 tsp
Green Chilly sause -- 2 tsp
Vinegar - 1 tsp (optional)
Tomato sauce - 2-3 tsp


For the Batter:
 1/4 C Maida  (I mostly use Besan/Kadala Maavu to avoid maida, it wont be as crisp but we don't mind)
2-3 tbsp Cornflour
2 tsp Chilly powder
1/2 tsp turmeric
salt according to taste
Water as needed

Chop the white and green part of the spring onion separately.
Mix all the ingrediants for the batter till there are no lumps and its a thick paste, which just coats the back of the spoon,
Dip the cauliflower florets in the batter and deep fry till golden brown. Keep aside.
In kadai (non-stick or otherwise) heat about 1 tbsp of oil.

Add the ginger garlic and spring onion whites, saute for one minute , do not brown.
Add the chopped onions and fry for 2-3 minutes on mediam flame, till they turn transparent and are just about to brown.
Stir in the capsicum pieces and saute for anthr 3 minutes.
I like to add half of the spring onion greens at this stage and reserve the other half for garnish.
Now time to add the sauces.
First reduce the flame to low (we dont want to burn the sauces do we).
Now in goes the soy, mix well.
Next comes the chilly, followed by the tomato sauce.
Mix everything together, taste and then add salt accordingly as soy is salty.
If you feel it needs a little more chilly kick feel free to add anthr tsp of it.
Keep tasting it and adjust the sauces to your taste.
Now if  you want a dry manchurian just put the fried floret at this stage and mix well till it coats the pieces.
Else mix 2tsp of cornflour in about 1/4 C of water and dissolve completely.
Add this to the kadai to form a semi gravy and let it come to a boil.
once its nice and thick (about 1-2 mins) we are done!
You can either add the fried florets now or only at serving time.

I prefer to add it now coz then it soaks the gravy up which makes it yum.
But it will make it a little soggy though so if your serving guests better mix just before serving.
And dont forget to garnish with the remaining spring onion greens!! 
Now this is an Indo-Chinese Twist..Or so I call it!
Njoi.
Simple Veg Pulao ~~~ Quick and Easy Dinner for a Working Day

Back home after a long long day in Office and feel like having something tasty and nutritious but without any extra effort. No kneading atta, and rolling out chappathis and then breaking your head on what dish to pair it up with.
This is it. A substantial filling meal that dances on your taste buds and allows you to freshen up and relax while its cooking.
So simple to make and absolutely yummy.

Ingrediants:

Rice - 1C (I used normal sona masuri. can use Basmati as well)
Onion - 1 chopped finely
Garlic - 5-6 cloves (can use a Tsp of ginger-garlic paste instead . Easier!!!)
Green chillie - 2 chopped finely
Carrot - 1 small
Potatoe - 1/2
Corriander for garnishing
Cumin seeds - 1/4 tsp
Saunf Seeds - 1/4 tsp
Cinnamon - a very small piece (roughly 1/2" piece)
Bay Leaf - 1
Cloves - 1-2
Elaichi/Cardamom - 1
Oil - 2 tsp

Soak the rice for 1/2 hour before preparation.
Wash and keep aside.
In a pressure cooker add oil or Ghee for more flavor.
Splutter the cumin and saunf(fennel) seeds, add bay leaf,cardamom and cloves and fry for a minute. Keep sharp watch as it will heat up quickly and burn.
One they are aromatic add the garlic and chillies and stir.
Add the onions and fry till golden brown.
Put the vegetables and fry for 2-3 minutes
Add the washed rice and fry for a minute or 2.
Add the appropriate amount of water (refer notes) and pressure cook.
Viola serve with a simple raita and some papads and we're done!!
For a lavish weekend meal pair it with some nice side dishes or curries.
These to follow soon!!!


Notes:

Sona Masuri needs twice the measure of rice + 1 cup of water - 4 whistles on high flame
Basmati rice needs 1 1/2 C of water for 1C rice -- 1 whistle on high flame
 
There are so many variations that can be achieved with this, you can add sweet corn, capsicum,mushrooms, baby corns anything of your choice and customize!!!!

Eggless Coconut Macaroons

I never though that I would ever post or make a coconut dish coz I do not like them much.
Used to hate them when I was a kid  ,but now take a more tolerant approach to it because my husband has his taste buds rooted deep in our Gods own country and hence most of the curries he likes are coconut based (ehhhh!!!) .
People find it hard to digest that being a Keralite I have not taken a liking to coconuts?? . Friends give me a weird look, its as though evryone form Kerala must and should eat fish and love coconuts!! Else they are not fit to be called a Malayalee.
I  beg to differ, I may not eat or like them but at heart I am hardcore Mallu :) .....

So coming to the recipe, I came across this on one of my usual visits to Ria's blog and they instantly appealed to me.
Could be because recently a friend of ours had got these from Kerala , its very common there in all the local bakeries, and i for the lack of nothing better to eat gobbled it and surprisingly liked it.
With that taste on my tongue this recipe instantly beckoned me and I had to give it a try.
But there was a small hiccup, i did not want to use eggs and this recipe looked too easy to go searching for another egg-less one.
So with Ria's blessings I decided to use some condensed milk instead of the egg whites in mine.
And was I pleased with the result.
these macaroons are just like Ria promises , crispy and crunchy on the outside and nice and soft on the inside.
So what are you waiting for.......you are not getting anything simpler esp if you have access to dessicated coconut.
Dig in!!


Recipe Adapted from : Ria's Collection

Ingredients:
1 1/3 c dessicated/flaked unsweetened coconut
1/3 c sugar
2 tbsp flour
1/8 tsp salt
2-3 tsp MilkMaid/Condensed milk -- enough to bind the ingredients together
1/2 tsp vanilla

Method: Pre-heat the oven to 325F(170C - 180C) and line a baking sheet with parchment paper(don't get parchment paper here so didn't use that, just the baking paper).
In a small bowl, whisk together coconut, sugar,flour & salt. Add the milkmaid and vanilla to it and mix well. You will have a nice soft dough. Spoon them onto the baking sheet using a teaspoon and bake for 20 mins or until golden brown (I wanted little conical macaroons and hence the shape). Let them cool completely on a cooling rack and then ,store in airtight tins.
Copy cat that I am , I too tried the conical shape :).
Will try the flattened cookie types next.

There were more ,but by the time I grabbed the camera only these many were left :).


Thank you so much Ria for sharing such a wonderful recipe!!

Notes:
I did not have or coudnt find any dessicated coconut , so I followed Ria's instructions in one of her comments.Scraped some fresh coconut and dried it in the oven at a low temperature, 160 degree C, for 15-20 minutes.
Take care that it doesnt change colour, it should only become dry not brown.
Mine didn't dry out much but I ran out of patience and used then anyways and they turned out just great!!!
Go ahead and make this...and the malayalees out there how many of you share my aversion to coconut?Please assure me Im not alone!!!

Indian Strawberry Cheesecake

I have drooled over cheesecake recipes and pictures on various Food channels and blogs, but without much hopes of ever getting to make one as they mostly call for cream cheese and other stuff quite out of reach for the Indian audience.
It was during one boring blog hunting session that I chanced upon Nandita's Blog and came across this recipe for an Indianised cheesecake.
It looked very simple to recreate and when we had a couple of friends over for dinner , I set out to make this (which feels kind of foolish on after thought as I should have first tested it out on my very own darling guinea pigs).
The fact that they asked for seconds was a saving grace.

I followed Nandita's recipe to a tee,except that I used fresh strawberries and did not get any blueberry jam to top it with.


Cheesecake standing tall!!!


Recipe Source: Saffron Trail

Keep a large strainer covered with a folded muslin cloth over a vessel. Once the yogurt is set well, turn in into the muslin covered strainer. Twist the muslin cloth and clip / tie it at the mouth. If the weather in your area is very hot, keep the strainer with yogurt over a vessel in the refrigerator for 5-6 hours until all the water (whey) is drained out. If you are not making the cheesecake immediately, store this thick block of curd in an airtight container in the refrigerator. Use within 24 hours so that it does not turn sour.
You can also use store bought yogurt like Nestle Dahi. You will need 2 tubs of 400 mg and one 200 mg tub to get a packed cup of hung yogurt.

Ingredients200 gm Parle G
3 tbsp melted butter 250 gm frozen strawberries (do not thaw) {I used 250 grams of Fresh one's}
1/2 cup sugar (add more if your strawberries are a tad sour, like mine were)

1 cup hung curd
1 cup cream

1 tbsp gelatin
4 tbsp water

2-3 tbsp Blueberry jam for topping (Coudnt get my hands on any then, have found them now, will try with this and post a pic)

Other equipment 

An 8-9" cake tin
Cling film
or
an 8" springform pan

Directions:
In a food processor, pulse the biscuits into coarse powder and mix in the melted butter well into it. (I powdered the biscuits in a ZipLock bag with a roller pin. Crushed it coarsely to my hearts content.)
Take a cake tin 8-9" diameter, line it with a large sheet of cling film big enough to cover the sides and come well out of the brim.(did not cover with cling film. We just cut the pieces directly out of the tin and served.)


Put in the biscuit-butter mix into the pan lined with film. Spread evenly and press well with heavy object such as mortar. Put in the freezer for 20 min or so to set.


Puree the strawberries and sugar together in a mixer to get a sorbet kind of mixture. Remove into a large bowl and keep aside.

Add the hung curd and cream, blend well to make a smooth mixture. Pour it into the bowl containing strawberry sorbet, mix them well with a wooden spoon.

Add 4 tbsp of water in the gelatin in a small heat resistant cup. Using a pair of tongs, hold the cup on the surface of water boiling in a pan. Stir the gelatin mix with a spoon continuously to get a clear liquid.

Pour the gelatin mix slowly into the strawberry mixture, stirring continuously.

Remove the set crust from the freezer and pour the strawberry mixture onto the set biscuit base.

Cover and put in the fridge to set overnight.


Come morning, rush to your fridge with a spoon in hand , and in true Nigella style devour it straight out of the pan.

Perfect home made French Fries

Though the rain continues to elude Bangalore that should be no excuse to keep away from rain time snacks like Bajjis,pakoras and French fries.

Nowadays there are very many frozen varieties available in the market, but when you have a toddler at home you can never stop worrying about all that goes into their mouths(i.e. with your knowledge, if you know what I'm saying)
And they just love potatoe dont they!! My 2 year old just loves potato roast, french fries and anything that has potato in it (are eating habits inherited too? I wonder).
So to enjoy a guilt free potatoe snack with your entire family this one bags the fries,I mean prize :).

Home Made French Fires:
Recipe: Cookery show on DD Malayalam


Ingredients:

Potatoes 3-4
Salt - 1tsp (or as required)
Oil for frying
Water to boil the potatoes

Method:

Cut the potatoes into wedges not too thick or thin (as in the pics above).
Wash them well after they are cut as well to remove most of the starch content. This yields crispier fries.
Boil enough water in a wide mouthed vessel to immerse the entire set of fries. Smaller the vessel more batches you will have to make, as im lazy i prefer to get it over with at one shot.
Add salt.
Put the potatoe wedges into the boiling water and cook for 4-5 mins (depending on the thickness of your fries) . Keep checking and remove them once they are 3/4th cooked or just before they are cooked fully.

Drain them on a kitchen towel and try to remove as much moisture as possible.
Lay them in a single layer and microwave on high for roughly 2 mins to remove water content if any (optional).
Now take a kadai and add sufficient oil to deep fry the potatoes.
Keep on medium heat and fry till golden brown.
Drain them on kitchen paper and sprinkle salt while still hot (so that it sticks).
Enjoy with your favourite dips!!!!
Hopefully will feature some of my dips here too!!!

Eggless No Bake Biscuit Brownies

There are many comfort foods, but among them the one that sits that on top is chocolate.
Nothing like it , be it a cup of hot steaming chocolate milk or a deliciously sinful brownie.
And if there is no whisking ,greasing and baking involved in making one? There is nothing to beat that then.
This is one such recipe I found in Edible garden and I just couldn't resist.
It was very easy and promises to live up to any chocoholics aspirations...
I followed her instructions to the tee.
Only as i did not have any hazelnuts (or know where to get them) ,I used cachewnuts.


They look like chunky rocky roads.


Ingredients:
20-25 Marie biscuits
3 tbsp unsweetened cocoa powder
1/4 cup roasted nut of choice
2 tsp sugar
1/2 of a 400gm tin condensed milk

How I Made It:

1. Break the biscuits into fours and powder coarsely. I put the biscuits in a ziplock bag and pounded them with a roller. (Works well a therapy too :) )
3. Add the cocoa powder to this and mix well.
4. Add the sugar to this mixture and mix again. If you prefer mildly sweet brownies, you can omit this but I found the sweetness level perfect with 2 tsp sugar.
5. Dry-roast any nut of choice and let it cool.Roughly 1/4 cup should do.
6. Chop it up coarsely and add to the mixture. Mix well.
7. Add half a tin of condensed milk to this mixture. Feel free to lick up the remaining condensed milk sticking to the tin!
8. Mix well with a sturdy spoon. I would advice against using a whisk at this stage because the mixture will be very very thick and refuse to cooperate. Show it who's boss! Mix well until all the powdery bits are combined with the wet ingredients.
9. Line a plate, pie dish, or baking tray with butter paper (or just great with some butter) and transfer the mixture to it. Press firmly with wet fingertips until the mixture is uniformly spread.
10. Refrigerate atleast for 4 hours or overnight if possible else you might get more fudgy brownies that won't hold its shape when you cut it. 
If you refrigerate longer, then they can be cut into perfect squares and taste delicious.

Perfect with some Vanilla Ice Cream as well. Drizzle in some Dulce De Leche and You're in heaven!!

Wednesday, August 1, 2012

Dulce De Leche

I have seen many a blogger go ga ga over this in the blogosphere.
Basically it is a sweet prepared by slowly heating sweetened milk to create a product that derives its taste from caramelised sugar. Literally translated, it means "candy of milk" or "candy [made] of milk", "milk candy", or "milk jam"
So i too set out to try it and find out what all the noise was about.
Frankly speaking I did not find it to be anything to be over excited about, well its nice ,in its own way , but will I be making it again? Not any time soon me thinks.
It tasted like what it was i.e. condensed milk that has been solidifed and I would rather lick a spoon of milkmaid than munch on this. Not that I have anything against it.

Having said that I was now the proud owner of a jar full of this stuff without a clue as to what to do with it.

How i went about it:

1)I filled my pressure cooker with water.
2)Placed a can of Amul Mithai Mate in the lying down position (not standing up) so that it half submerged in water.
3)Closed the lid(with the gasket),and on a high flame, when the steam comes place the weight and after the first whistle, remove the weight and lower the flame to simmer.
5)Let it simmer for 40-45 mins. (the longer you steam it for the thicker and richer will be the colour).
6)Wait till it cools down to room temperature and then open it and use it however you like.


I found a couple of brownie recipes that called for the inclusion of eggs and I wasnt too keen on that.


The other day it so happened that after a lazy Saturday lunch, i wanted something sweet (as usual) and there was nothing at home!
Opened the fridge , glanced at the assorted(read crowded) stuff inside, nothing caught the eye, was just about to close the door when I chanced upon the jar sitting neglected in a corner and hoping to be picked.
I thought why not, I want something (anything, other than plain sugar) sweet and this is sweet.

So i took a spoonful, plopped down on the sofa, with "The Big Bang Theory" for company (I just love these guys, they are so damn funny) and started licking it.
I was halfway through , and realized that I was not enjoying this very much.
I wanted to dress it up a little, so I took a Marie biscuit, spread some of this stuff on it ,placed another biscuit on top and Viola there was a dulce de Leche Marie sandwich.
Which was actually pretty impressive.
If you have some chocolate cake handy, you can place a nice thin layer of it on top of the DDL and make your own easy biscuit pudding.

Quinelle of the Leche resting atop a stack of biscuits

A tasty mountain,a browny spotted in the vicinity.